Wednesday, January 30, 2013
Nature Journal: Tree Rings
What can a simple cross section of a tree reveal? Much more than just it's age to the savvy well-trained eye. Each year a tree forms a new tree ring, which is essentially a new layer of cambium, the layer of the tree responsible for moving food and nutrients between the roots and the tree itself. By counting these rings the tree's age can easily be determined. Spend a bit more time and examine the distance between the rings and you may learn about the tree's life.
Tight narrow tree rings indicate less favorable conditions than the wider more generously spaced rings.The spacing between the rings reveals a story about the tree's life and environmental conditions. A tree with narrow rings may be a tree that suffered through a multi-year drought or perhaps encountered difficulty finding enough nutrients, sun, or proper soil composition. Sudden widening of rings may indicate a larger competitor for light had fallen that year.
Enjoy the study of tree rings as much as I do? Check out the book Woodcut by Bryan Nash Gill. Gill is an artist who makes his own one of kind stamped images from tree rings.
Labels:
Nature Journal
Tuesday, January 29, 2013
Sunday, January 27, 2013
Make a Mini Survival Kit in iPhone Case
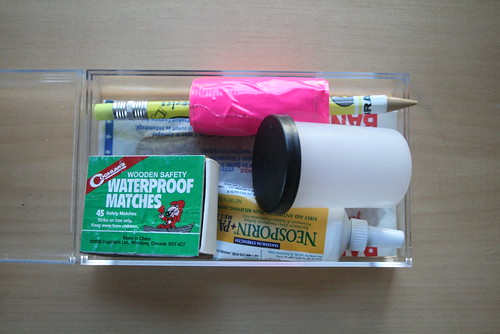
Inspired by Field & Stream's Make a Survival Kit out of an Altoids Tin I decided to make a mini survival kit in an iphone case.
My case includes:
Extra tough extra large Band-aids
Several additional Band-aids
Waterproof matches
Mechanical Pencil wrapped in pink Duct Tape
Tube of Neosporin
Tube of Vaseline soaked cotton balls for fire starting
Ways to improve it and things to add:
fishing line
pocket knife
small compass
mini flashlight
Check out Field & Stream's article for a great comprehensive list on the last page of things to include in your kit.
Labels:
How to,
Survival Skills
The Art of the Holz Hausen Woodpile
If you have ever had a woodpile avalanche--- the sudden spill of your neatly stacked woodpile into a messy pile--- you've probably thought- there has to be a better way! Enter the Holz Hausen woodpile, a method of stacking wood in a cylindric pile that allows for better air circulation (think better drying!) and more security if built properly.
The Holz Hausen's circular form allows air to "chimney" up through the center of the wood creating it's own circulation system, thus drier wood. It's considered more stable than your traditional woodpile because it utilizes a circle as a base. Plus, all those random small and oddly shaped pieces of wood have a home in the Holz Hausen! No more oddly leaning woodpile with random slices of wood sitting around waiting for a spot.
The Holz Hausen's circular form allows air to "chimney" up through the center of the wood creating it's own circulation system, thus drier wood. It's considered more stable than your traditional woodpile because it utilizes a circle as a base. Plus, all those random small and oddly shaped pieces of wood have a home in the Holz Hausen! No more oddly leaning woodpile with random slices of wood sitting around waiting for a spot.
Quite frankly a Holz Hausen woodpile calls to the passerbys and onlookers. I can't tell you how many people used to comment on ours. It's sort of a backwoods tourist attraction.
Interested in a more detailed how-to? Check out this video....
Labels:
Fire,
Nature Journal,
Survival Skills
Thursday, January 24, 2013
Stacking Wood
There is nothing more satisfying than stacking your own wood into a neat little woodpile. It’s been several years since we have heated by wood, but I remember it fondly each time we venture off to one of our favorite vacation spots in Northern Maine.
A carefully planned, stacked, and dried woodpile means easier living in the winter months. Placed nearby a door and you can pop in and out with the winter winds are blowing and grab a few pieces without freezing your buns off.
Wood is purchased by a measurement called a cord. One cord of wood is equal to roughly 4x8 feet of stacked wood or roughly 128 cubic feet. A few cords of wood will warm a small to medium sized house for a winter.
Just as there are this is more than one way to skin a cat, there is more than one way to stack your firewood.When determining where to stack your wood, look for someplace with a lot of direct sun to help dry out the wood. Having a garage wall or gate to line the wood up against is also a great idea and should still dry appropriately given time.
The most traditional way to stack wood is by creating a long single stack of wood. Stack a few pieces at a time and then turn the next line of wood in the opposite direction. This is called cribbing and is absolutely necessary to avoid an avalanche of wood when the wind blows. By the way, nothing stacks wood quicker than stopping to sip a beer. So I definitely recommend considering that as well.
Labels:
How to,
Nature Journal
Wednesday, January 23, 2013
Origins of the New England Stonewalls
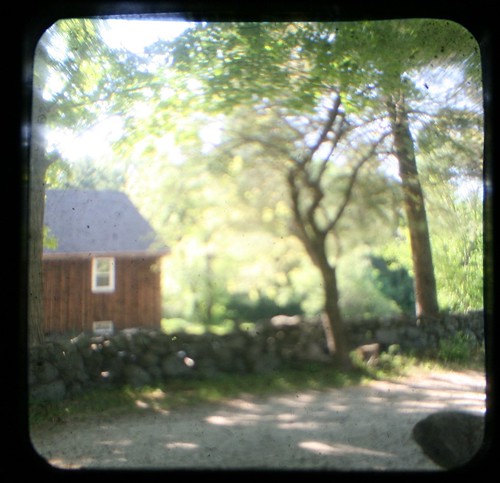
A lifelong New Englander, I have always thought the many hundreds upon hundreds of stonewalls that litter our region were originally property markers that marked the edges of owners land. It turns out that these amazing (and backbreaking!) works were originally built for an entirely different purpose.
In the early 1800s the United States government placed a tariff on all goods from England and this included wool and wool products. The need for wool for early settlers was great as it was a good that could spun, woven, or knitted at home to create warm clothing and blankets. Roughly the same time, a small flock of merino sheep were introduced to the area and their incredibly soft wool was highly prized. Not long after, a "sheep craze" took over the area and nearly every small farm had their own flock.
Keeping the thousands of sheep in separate fields across the region was no easy feat. Acres and acres of forested land were cut down for grazing fields for the sheep. In fact, the deforestation of New Hampshire and Vermont in the mid 1800s was due, in large part, to this sheep craze.
Soon farmers were building very large (four feet tall) stone walls to keep their tiny hoved flocks together. Since a flock of sheep could ravage someones crops in short time, these high walls were enforced by law and fines were high for any field found lacking.
Labels:
Nature Journal
Tuesday, January 22, 2013
For the Love of Fire
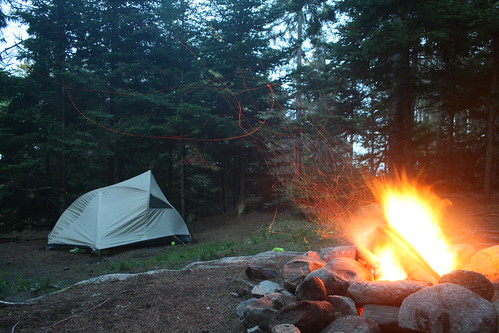
If you’ve been to my pinterest boards lately you’ve probably noticed how obsessed I am with fire and wood. There is something so wonderfully rustic and honest about fires. Have you ever been on a long camping trip and come back to your site to build a fire? It warms more than just your body that’s for sure. Sitting by a fire does something good for your spirit. It builds you back up.
I had been planning on spending the month of February writing some bits and pieces about fire, stacking wood, and starting a fire, but I think I will start early.
My upcoming posts will include a little of the following:
- How to make a woodpile
- What’s there to a woodpile anyway?
- The Art of the Holz Haussen woodpile
- How to start a fire
- Starting a fire in harsh conditions- windy and wet
This week will bring record cold up here in the Northeast and thinking about fire will help keep me warm….
Labels:
Fire,
Nature Journal
Monday, January 21, 2013
Becoming a Scout Bee

Bee colonies are comprised of several different “bee occupations” if you will. The queen bee's, we all know well, sole occupation is to create more bees. Worker bees, well, work by collecting pollen from flowers and maintaining the hives perfect temperature control, among other things. Of course there is the drone bee and my favorite- the scout bee.
The scout bee’s primary job is, when the time is right, to spend their time exploring cracks in the roof, tree branches, and mountain nooks to find the perfect place to relocate their hive. Scout bees start their lives as forgers, or worker bees, destined for finding, collecting, and maintaining group harmony. Somewhere along the way of their short little lives, scout bees change their flight path from forager to finder and become a scout bee.
But how does one bee out of the masses of worker bees become a scout bee? Well, scientists have recently identified changes in brain chemistry that can “turn on” the adventure in non-scout bees. Indicating that while scouts require certain hive circumstances (mainly a queen without a home and a hive that isn’t too hungry) to initiate their scout instinct, they are somewhat genetically, or at least neurochemically predispositioned to seek out new terrain.
Brains of Bee Scouts, The New York Times
Honeybee Democracy, Thomas D. Seeley
Labels:
Nature Journal
Introducing the Nature Journal
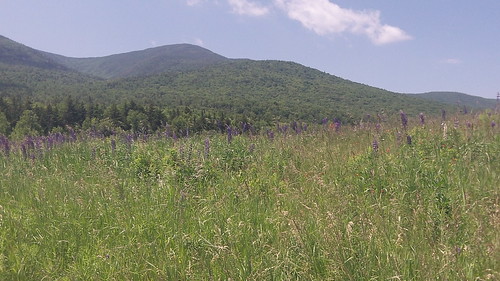
A lifelong lover of the outdoors I have always found myself to be fascinated with it. Spend enough time on the trail or sitting outdoors and soon you'll be curious about the smallest of things- the clusters of flowers by the trail's edge, the preponderance of ticks and the names of trees.
My blog here at Betty Mountain Girl has always been a place to share- adventure, the outdoors, and now nature. I'll be writing a new section for the blog called The Nature Journal. You can follow this section by looking through my tags for Nature Journal. The bits and bobbles I plan to post will include my notes, research, and observations on the things that make up the spaces I seek. Please enjoy the ride!
Labels:
Nature Journal
Thursday, January 10, 2013
The Pedal Inn Kickstarter
This kickstarter has already been funded, but it looks like a great read! All my favorite things into one- biking, adventuring, and really, really good food.
Tuesday, January 8, 2013
Cabin of the Week
This hotel in Switzerland features something called Ecopods-- basically a small, fully insulated wooden hut in a perfect location. Inside it sleeps two people in these adorable little quarters.
Labels:
Campers Cabins and Fun Living,
Fun
Monday, January 7, 2013
Hiking the Winter 4,000 Footers: Mount Tecumseh 12.24.2012
Number two on our winter list! Our summer hike of Tecumseh here. Summer list here.
The only reasonable way up Mount Tecumseh in the winter begins at the Waterville Valley Ski area. We decided to sneak a quick hike in on Christmas Eve since we had the day off and figured the trails would be relatively empty.
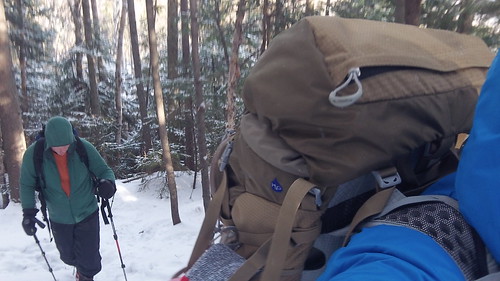
Fortunately, since we had already hiked this peak over the summer we knew exactly where to find the trail head. It can be slightly tricky if you haven't been to the ski area yet. Over the summer there was some sort of running/biking event going on with roads closed all over the place making it a bit tricky.
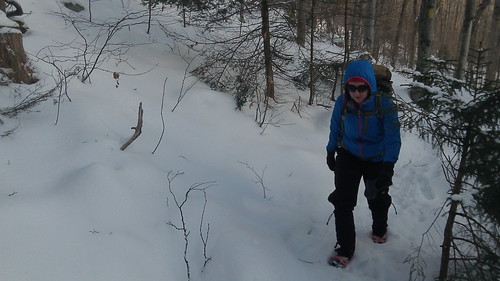
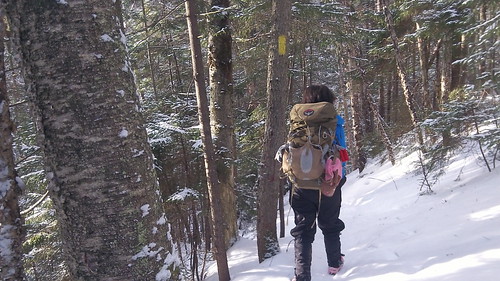
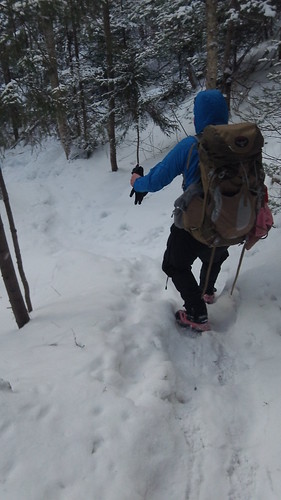
Christmas Eve was very, very cold up north. Winter hiking its tricky because nearly the whole way up your sweating like a madman carrying all that gear. Somewhere near the top some random part of your body starts to get cold- your nose, your pinky, one ear- and you have to stop and layer up some more. This is a huge reason that I prefer hiking with just one other person in the winter. Groups stop frequently and it is hard to stay warm enough while waiting and cool enough while hiking.
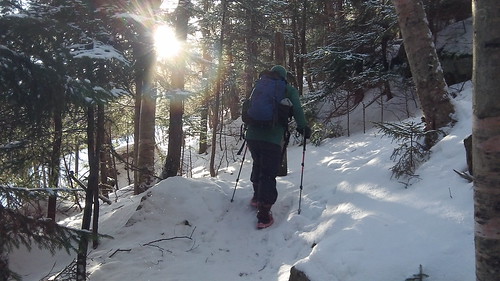
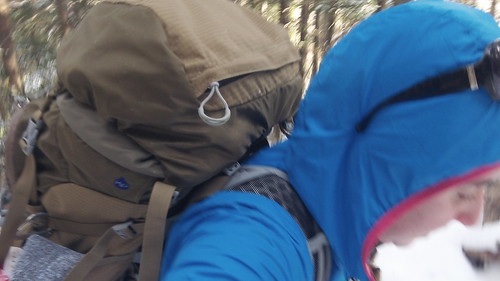
The trail was nicely packed down and snowshoes were not required. We wore our Microspikes which were perfect for the trail conditions. The entire way up we didn't bump into a soul although the grinding of the chair lift could be heard in the distance. Near the top the wind was humming and the temperature dropped very significantly Views to one side of the mountain could be seen while hiking up and on the summit.


The climb overall was great. My legs screamed on the climb and my lungs cleared right out with all that freezing cold fresh air. Hikes like these make me feel so much more alive.
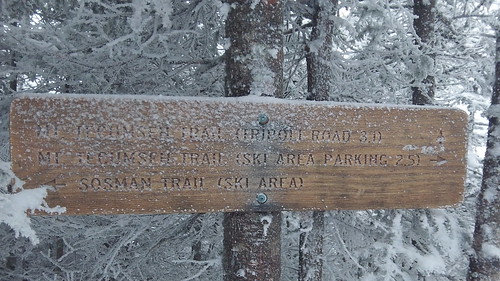
The only reasonable way up Mount Tecumseh in the winter begins at the Waterville Valley Ski area. We decided to sneak a quick hike in on Christmas Eve since we had the day off and figured the trails would be relatively empty.

Fortunately, since we had already hiked this peak over the summer we knew exactly where to find the trail head. It can be slightly tricky if you haven't been to the ski area yet. Over the summer there was some sort of running/biking event going on with roads closed all over the place making it a bit tricky.


Christmas Eve was very, very cold up north. Winter hiking its tricky because nearly the whole way up your sweating like a madman carrying all that gear. Somewhere near the top some random part of your body starts to get cold- your nose, your pinky, one ear- and you have to stop and layer up some more. This is a huge reason that I prefer hiking with just one other person in the winter. Groups stop frequently and it is hard to stay warm enough while waiting and cool enough while hiking.


The trail was nicely packed down and snowshoes were not required. We wore our Microspikes which were perfect for the trail conditions. The entire way up we didn't bump into a soul although the grinding of the chair lift could be heard in the distance. Near the top the wind was humming and the temperature dropped very significantly Views to one side of the mountain could be seen while hiking up and on the summit.


The climb overall was great. My legs screamed on the climb and my lungs cleared right out with all that freezing cold fresh air. Hikes like these make me feel so much more alive.

Labels:
Hiking,
The List,
winter,
Winter 4000 Footers
Ten Tips for Staying Warm Outdoors in the Winter
Winter is a great time of year for spending some time outdoors- ice skating, ice hockey games, making snowmen, sledding, and making snow angels. Here's how to stay warm outside:
- Eat-- One of the easiest (and most fun!) ways to stay warm outside is making sure your have something (but not too much!) to eat. Being hungry zaps your energy. Fatty and nutrient rich foods such as nuts, yogurt, and cheeses help. When I am on the move (hiking, etc.) I prefer high calorie drinks- hot cocoa, smoothie type drinks, tea and gatorade mix, etc.
- Focus on Extremities-- Lots of heat escapes from our extremities (think head and feet). Keep your head covered with hat and hood will keep you a lot warmer than you would think.
- Keep Moving-- Sports such as ice skating, sledding, and making snowmen (it's a sport!) involve moments of being sedentary. Staying moving helps your body stay warm from its own heat. I find that moving is a sure fire way to get my feet warm again!
- Drink-- Stay hydrated as being dehydrated zaps energy very quickly outdoors.
- Stay Dry-- This can be tricky if you are trying to stay moving. When you are wet, especially if you are wearing something that doesn't wick or dry quickly your body rapidly loses heat. Stay dry by wearing layers so you can remove them as you heat up. Wear only wicking fast drying clothes and change out of wet clothes as quickly as possible
- Warm it up-- find other ways to stay warm such as using hand or foot warmers
- Think about your feet-- So much heat escapes from our feet! Think about it--- your feet are touching the ground which is covered in snow and ice. Wear snow or pack boots if possible, smartwool or wool socks, and two layers of socks if they'll fit.
- Layer up-- Having a lot of layers on is key to staying warm. You can remove layers as you heat up and put on layers as you cool down. You can also remove any layers that are wet.
- Think wool-- My personal preference is wool. I find even the thinnest layer to be incredibly warming.
- Hot Water-- Hold onto a thermos of hot water (warms your hands). Drinking from it slowly will also help maintain a warmer body temperature.
Stay tuned for future posts- staying warm winter hiking and staying warm winter camping!!
How to Wash and Care for Your Gear: Outer Layers, Softshells, Waterproof Jackets, and Down
Waterproof jackets such as hardshells, softshells, and other gear with waterproofing can really take a beating without proper washing. Sweat and oil from your body can interfere with the membranes ability to breath as well as repel water. Washing and Caring for your technical gear will improve function and longevity.
(NOTE-- Carefully read your clothing and gears labels and follow them carefully. If you have questions or are unsure of how to appropriately care for an item contact the manufacturer/retail store directly.)
(NOTE-- Carefully read your clothing and gears labels and follow them carefully. If you have questions or are unsure of how to appropriately care for an item contact the manufacturer/retail store directly.)
For Outer Layers (softshells, hardshells, waterproof jackets)
How often should you wash your waterproof jacket and gear? Of course it's dependent on usage and the maker's recommendations. I wash my softshells and waterproof jackets every other month if they've seen a lot of usage. A tell tale sign that you are due for a wash is finding that your waterproof jacket "isn't so waterproof anymore." While it probably needed to be washed months, or in some cases, years ago- I have seen jackets come back to life with a good wash in TechWash (NikWax).
- Wash on gentle cycle or reduce agitation on the normal cycle
- Wash in cold water (check your label-- I happen to prefer washing everything in cold water)
- Wash with like things- be careful of velcro, snaps, clips or anything else that can snag.
- I like to zip up pockets so they won't snag on anything.
- Unroll hood if it's rolled up
- You can use a very gentle detergent, but I prefer using TechWash by NikWax. I've used it for years and it really has done a nice job time and time again.
- One time I had a jacket that I neglected far too long and I washed it twice with TechWash. This did the trick and it was much more waterproof.
- Hang dry on a rack or chair
- I've used TX.Direct Spray On in the past and found it to be fabulous. I only used it on waterproof hardshells and I actually tried it on my tent. It had a nasty smell (this was years ago that I used it so I am not sure if this is still the case), but it really helped with waterproofing. After the product dried it no longer smelled. I haven't tried their softshell similar product yet.
- Fix or repair any holes, rips, or tears (see your local outdoor retailer for products- depends on the material of the item in repair)
- Always thoroughly dry out your gear when returning from a trip. Even if it doesn't feel wet it still may be damp and need to be dried over a chair or rack.
Also in this series:
Disclaimer: Product Reviews and How to's are based on opinion only and are not intended to condone, encourage, or promote a product. Some products are sent to me by the manufacturer or affiliates and are mine to keep. I mention this specifically on products sent to me. Compensation and/or product and/or services never interfere with the review of the product. Otherwise, products and services are purchased by me for personal use. I have purchased way too many bottles of Techwash and TX.Direct Spray On than I care to recall.
Saturday, January 5, 2013
Product Feature: Bani Bands
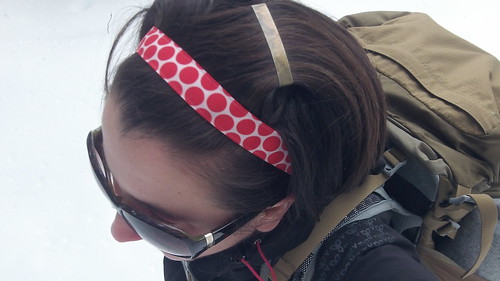
I was recently sent a few Bani Bands (see cute red polka-dot) to try out first hand. One thing I have a lot of is hair- thick, sort of mind-of-its-own short hair. Since it's a little too short to put up in a full pony tail I end up going half pony tail or pigtails a lot. Then I get all those wispy things in front of my eyes. No biggie unless I'm on top of a mountain with high wind speeds or riding my bike down a long technical downhill.
These bands were super cute and functional. They have a soft inside velvety layer that prevents them from slipping all around and absorbs and wicks some of the sweat. The band has a fully adjustable clip that allows it to be whatever size your little noggin is. Helpful for me since my hair sometimes makes headbands and even hats too tight.
Overall I found them to be a nice band for girls on the run (or the hike or the bike!) since they fit comfortably under anything (helmet, hat) easily. I just discovered they have sequin ones on their site here! I think I'll have to sequin up my next hike. It never hurts to be a little girly when ripping it up on the trails. Here are some ways to get your own Bani Bands:
Bani Bands website
Disclaimer: Product Reviews and Features are based on opinion only and are not intended to condone, encourage, or promote a product. Some products are sent to me by the manufacturer or affiliates and are mine to keep. I mention this specifically on products sent to me. Compensation and/or product and/or services never interfere with the review of the product. Otherwise, products and services are purchased by me for personal use. When companies pitch me their product I tend to select ones that I personally like and think my blog readers want to read about. The Bani Bands were sent to me.
Labels:
Reviews
Friday, January 4, 2013
Happy New Year!
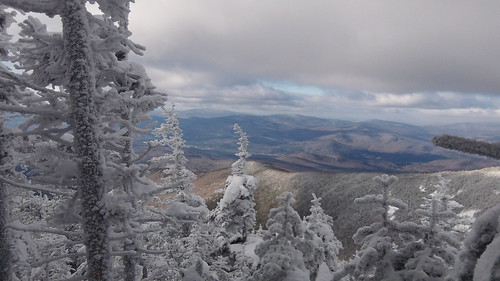
Happy New Year Everyone!! 2012 was a wonderful year full of adventure and outings. Have you built yourself any adventure lists for the New Year? If so- what 'cha scheming?
Here's some things on my list for 2013:
- Finish Hiking the White Mountain's 4,000 Footers (37 down so far!)
- Finish at least 10 of the Winter 4,000 Footers (2 down!)
- Try log rolling
- Complete Trans Presidential Hike (this goal keeps cropping up year after year- time to get it done!)
- Visit Lake Umbagog
Labels:
Fun,
Outdoor Sports,
The List
Subscribe to:
Comments (Atom)


